New for 2019

My Bangladesh Kitchen – a new cookbook from Saira Hamilton

Front Cover Image

Bangladesh is a land of contrasts, from busy cities to the verdant and fertile countryside, with fish ponds, lakes and rivers at every turn. The cuisine reflects the abundance of vegetables and fish, and has a distinctive taste defined in particular by tamarind, the ubiquitous mustard oil, and the spice blend called panch poran. In this book Saira has brought together her much-loved recipes, with 100 everyday classics, regional specialities, street snacks, and impressive celebration food too. It is packed with background detail and anecdote, vibrant photographs of every dish, and an informative introduction describing the ingredients and cooking techniques of Bangladesh.

“Bangladesh is a country everyone has heard of, but few people know. On one hand, you have the high-energy bustle of the city, enveloped by the dusty, smoggy air, diesel fumes and heady street-food smells. At the other end of the scale you have the beauty of the countryside, with its reddish heavy-clay soil, lush greenery, and the abundance of water in ponds, lakes and rivers. The Bangladeshi connection to the land is still incredibly strong. There are many years and many memories held within these recipes from across the range of Bangladeshi cuisine. These dishes will introduce you to some of the ingredients and cooking techniques which make Bangladeshi cuisine what it is, and I hope that they will become as familiar and dear to you as they are to me.”

Saira Hamilton, 2019
HyperFocal: 0
HyperFocal: 0
HyperFocal: 0
HyperFocal: 0

Saira Hamilton is a chef, cookery demonstrator and food writer, specialising in her Bengali-inspired food. Saira reached the finals of MasterChef 2013, and during the competition won high praise for her delicious dishes and deft spicing. Saira’s family settled in the UK but always maintained a close relationship with the country, and spent many holidays in Bangladesh. Saira’s love of cooking was inspired by her mother Nadira, and the passion she kindled in her for the food and culture of their motherland.

Please contact Joanna on jlorenz@anness.com for more information, reviews and features.

£20.00 / $35.00
288 pages, 255 x 208 mm, hardback
ISBN: 9780754834502


Green Street

There’s a place I go to called Green Street.  In the heart of Forest Gate (that’s E7), just down the road from the old West Ham ground at Upton Park, and I’ve been going there ever since I was a little girl. Growing up in Harlow in the 70s and 80s, we didn’t have the luxury of big supermarkets stocking everything we needed from chillies and coriander to black lentils or cumin seeds. So there was a fortnightly trip to Green Street to stock up on all our Asian grocery essentials. And if you need dozens of types of lentil or any spice under the sun, it’s still the place to go.


These days I can get all my Indian cooking essentials at the Asian and Oriental supermarket in Harlow (it’s called M18, off Edinburgh Way, tell Shahid I sent you!) but I still love a trip down to Green Street when I need something special. These photos are from Bharat Stores, which is my first stop for any trip to Green Street.

If you’ve never been down there and you have any love of Asian food, culture or fashion, you won’t be disappointed. Another added bonus of visiting from May through July are the stacks of boxed mangoes which can be bought in the greengrocers or just being sold by some guy on the pavement. There’s something about the mango-selling guys, they really are the Del Boys of the street. Lots of banter, lots of chat about how their mangoes are better than the other guy across the road and lots of offers which always tempt me to buy 2 boxes when I really only wanted 1! 

But it’s so worth it. The flavour and melting texture of the Kesar, Chausa, Honey and – the king of all mangoes – the Alphonso, are positively ambrosial.  If you’ve only ever tasted a supermarket, South-American mango, you’ll be amazed at how different the two fruits are. They are smaller and sweeter and not at all stringy or fibrous inside. But watch out for the juice! It’s been said that the best place to eat a mango is in the sea or in the bath, but careful use of a napkin can be just as effective.


So a few hours browsing the jewellery, beautiful sarees and shalwar kameez (just looking!) and more importantly cookware and vegetables is always a pleasure and never a chore. Do you have any top tips for Asian groceries? Where to buy them? How to use specialist ingredients in your dishes? Can you find fresh turmeric for sale somewhere near you? If you do, I’d love to hear from you. Contact me on Facebook (Saira Hamilton Chef), Twitter (Saira Hamilton) or by leaving a comment below.

SaveSave

SaveSave

SaveSave

SaveSave

SaveSave

BBQ weather! The recipe everyone needs…

It’s time for a recipe. I’ve been working on an exciting project with a charity called Find Your Feet which runs a brilliant campaign called ‘Curry for Change’ every year. This encourages anyone who can cook, from top restaurant chefs like Vivek Singh to supper club hosts and food bloggers, to hold events to raise money for people suffering from food poverty in Asia and Africa. Click on the link to find out how you can join in!It’s a great campaign that I have supported in the past and this year I am helping them with a new angle to the campaign which encourages home cooks to host a dinner party at home. This is called ‘Host at Home’ and what with my ambition to get everyone cooking authentic Indian food and curries from scratch, at home, it was a no-brainer for me to offer my services to help them.

So watch this space for my Host-at-Home recipe pack, which will come with full recipes for a 3 course meal and step-by-step instructions on how to deliver a fabulous evening with a minimum of stress and fuss. As I was working on my recipes, I realised that there is one recipe I use probably once a week during the summer that I haven’t shared for quite a while.

Sheek kebabs are traditionally made with minced meat, often mutton but they can be made with beef, lamb, pork, turkey or anything else you like to eat to be honest. If I can’t get mutton, my preference is to use a mixture of lamb and beef mince, as I think you get the depth of flavour from the beef and the nice juiciness that comes from the higher fat content in the lamb.

The recipe is in fact terribly simple. Shove all the ingredients in a bowl together and mix them really, really well. I don’t mean just move them around in a clockwise direction, I mean really get in there and squish it all together so that every mouthful of the finished kebab is soft and yielding, and has a good mix of all the flavours and spices. And then you grill them. Simples!

The mixture can be made well ahead of time (24 hrs in advance if necessary) and stored in the fridge. At the last minute add the lemon, form the kebabs on skewers and the grill on a pre-heated barbecue for 6-8 minutes. Job done! Served with yoghurt raitha and some salad, these kebabs will enliven any BBQ spread. Much more interesting than just the usual burgers and sausages. So give this super-simple and delicious recipe a try and I promise you won’t be disappointed.

Recipe: Sheek kebabs

  • 600g minced beef or lamb (or a mixture)
  • 2 tsp garam masala
  • ½ tsp turmeric
  • 1½ tsp ground cumin
  • 1½ tsp ground coriander
  • 1 tsp chilli powder
  • 1 tsp salt
  • 1 red onion finely diced
  • 1½ tbsp garlic paste (crushed or grated fresh garlic is perfect)
  • 1½ tbsp ginger paste (crushed or grated fresh ginger is perfect)
  • 2 green chillies, finely chopped
  • big handful of chopped coriander (or mint and parsley)
  • 1 egg, beaten
  • 40-50g breadcrumbs*
  • zest and juice of half a lemon

Method

  1. Place the minced meat in a large mixing bowl, and add in all the other ingredients. Mix together really well, with hands is always best! If you can leave the mixture to develop the flavours for an hour or two, the resulting kebabs will be better. If the mix feels too wet, add more breadcrumbs. If it is too dry you may need to add more egg. If you are preparing the mixture in advance, leave out the lemon zest and juice and only add this just before cooking.
  2. Divide the mixture into 16 equal portions, by dividing the mixture in half and then half again until you end up with 16 balls of kebab mix. Take each portion and roll into a long thin sausage shape; the easiest way is to crimp it around a metal or bamboo skewer. Wet your hands between each ball for a smooth finish. Press the mixture together well whilst shaping the kebabs to ensure you have a good texture to the finished product.
  3. Once formed, cover with cling film and allow the kebabs to rest in the fridge until you are ready to cook them (at least 30 minutes). When you are ready to cook, pre-heat your BBQ to a medium-high heat. Carefully place the kebabs onto the BBQ and grill. The kebabs will need to be turned several times, but wait until they have a good caramelised colour on one side before turning to avoid them breaking apart during cooking. They should only take 6-7 minutes, but always check the meat is cooked to your liking before serving. Serve with raitha and lots of salad dressed with lemon juice, oil and a pinch of salt.


* if you need to make these gluten-free you can use GF breadcrumbs or gram flour instead

Velkommen til Norge

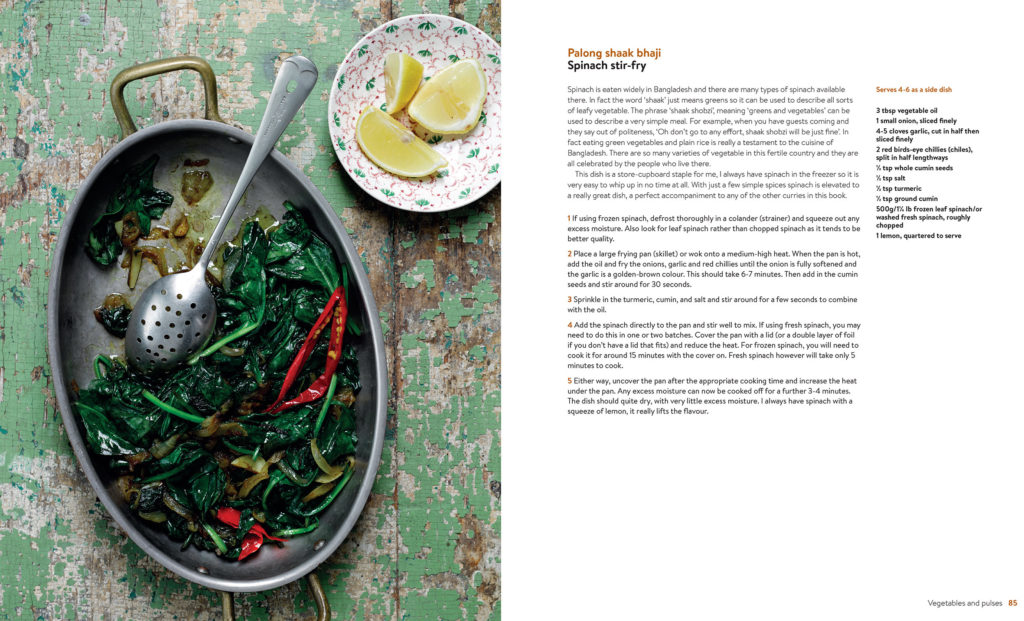
We’ve just come back from Norway. We went to visit our friends Inger-Anne, Jan-Erik, Astrid and Ingeborg who live in Oslo. When we lived in Cairo, my daughter Lily and Astrid were great friends and when planning a surprise trip for Lily to celebrate the end of her exams, it seemed the obvious choice. I have visited Norway many years ago with my parents but that was a long time ago and I only had vague memories of the place.

So we were delighted to arrive in Oslo to be met with glorious sunshine. We managed to get ourselves on a train to Skøyen where our friends lived. Norway is one of those countries where everyone seems to speak perfect English which makes life very easy for British travellers. It was incredibly easy to find our way around; the signs were in English and the dual-language announcements on the train meant there was no excuse to miss our stop.

We arrived on a stunningly beautiful day and it seemed that every stunningly beautiful Oslo resident was out in the city’s green spaces or waterfront areas sunbathing, eating, drinking and generally having a whale of a time. Our hosts prepared us a lovely buffet lunch and then offered to take us out on their little boat for a quick water-tour of Oslo followed by coffee and cake at their little cabin on an island called Lindøya. It was a fairly easy decision!

The little cabin turned out to be a picture-perfect wooden house with a large garden and a gorgeous sea view, 2 bedrooms, small kitchen, lounge complete with woodburner, shower room and a technological marvel known as an electric toilet. I honestly can’t remember the last time I was so impressed by a toilet. The coffee was top notch (as it always is in Norway I was to discover – no instant coffee granules in sight) and the cake was a pavlova covered with piles of fresh strawberries, raspberries and blueberries.

Lindøya was originally an escape for the workers in 1920s Oslo who would row over to the island and spend the summer in tents to escape the poor air quality of their industrial working conditions. Eventually the city council allowed them to build wooden cabins on their plots and the structures have remained pretty much unchanged since that time. There are no cars or bicycles allowed on the island, cabins are not allowed to be expanded or changed outside the original footprints and many of the owners are now third generation family members of the original owners. It was truly a magical day topped off with a fantastic supper on the way home at a restaurant only accessible from the water where I had a local ‘fiskesuppe’ or fish soup with crusty white bread and a very cold glass of wine. Heaven.

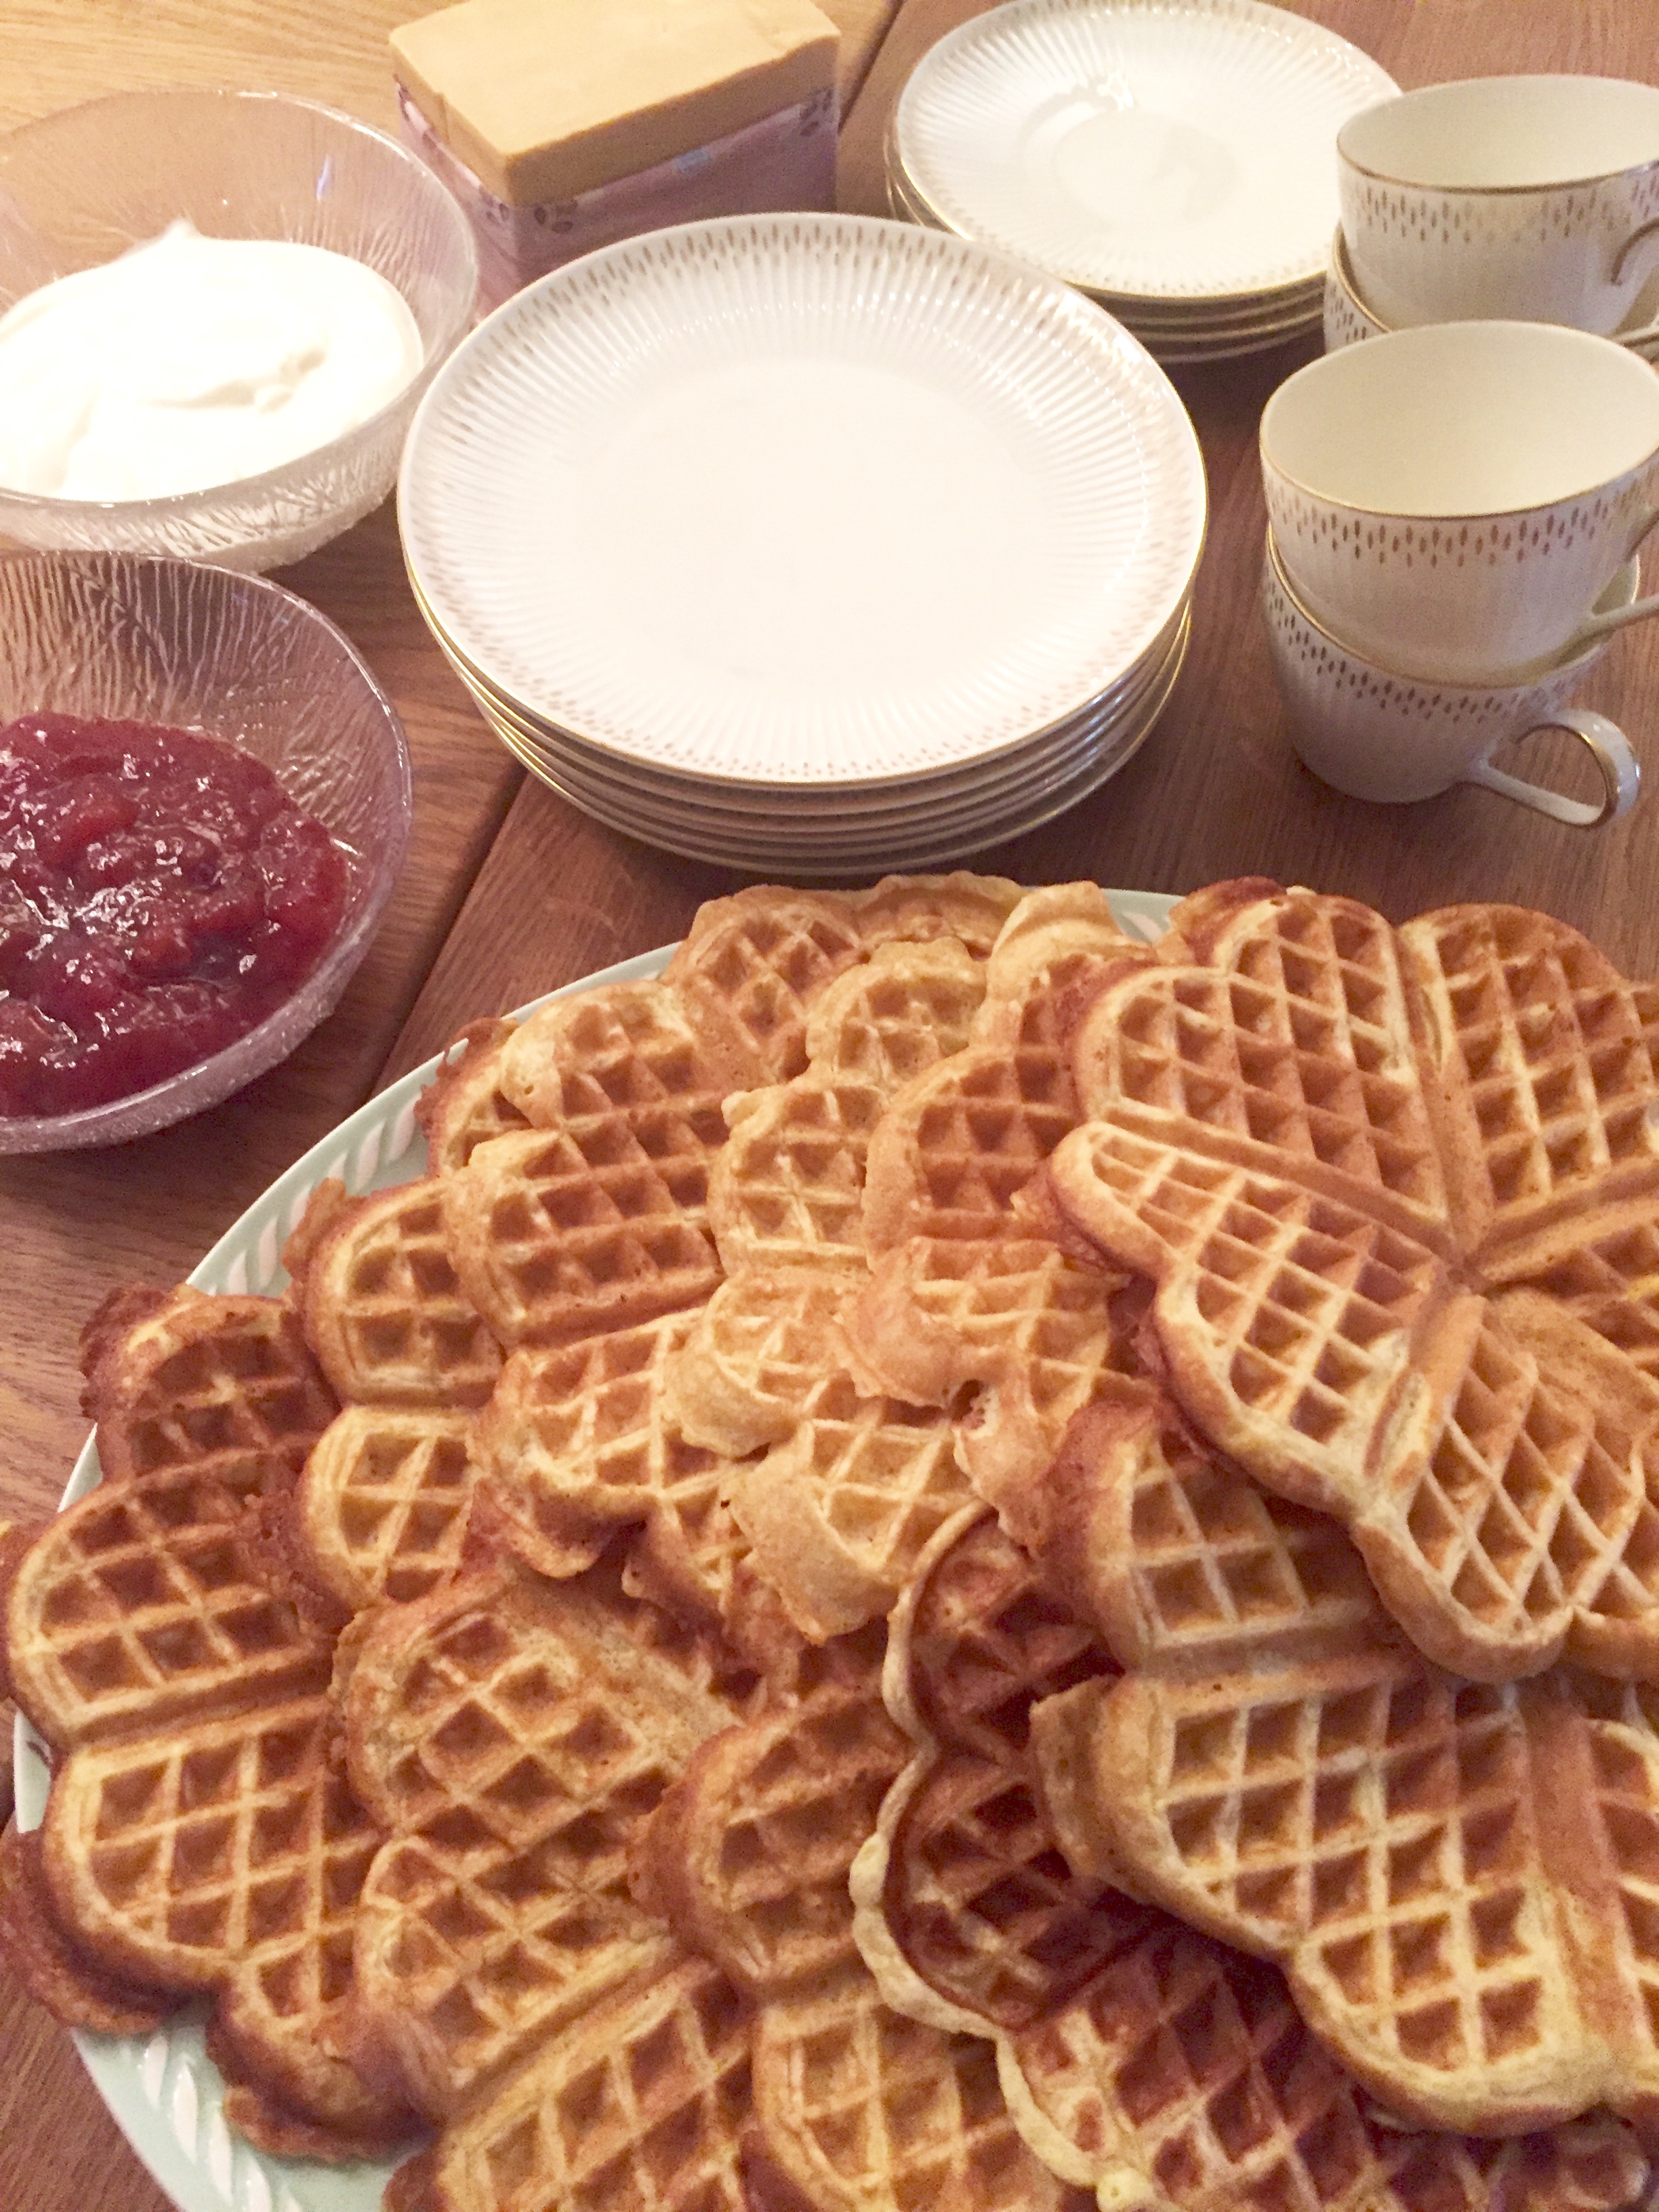
Another Norwegian speciality and a recipe I wanted to share with you is for ‘sour milk waffles’. It doesn’t sound too appealing but the sour milk is actually buttermilk whIch lends a great flavour and fluffy texture to the waffle and these are such a traditionally Norwegian thing to eat I had to share it with you.

The other traditional Norwegian dishes I was looking at were lutefisk – which is white fish, often cod, which is dried and brined and then soaked in lye, which gives it a gelatinous texture. Or maybe hvalbiff which was on the menu at the restaurant we ate in, which was whale meat served with boat potatoes and steamed vegetables.

So I thought the waffles would be best! The waffle mix smells lovely even before you cook it. Inger-Anne says for her it is the smell of childhood as they used to have these waffles all the time for any school events, festivals or perhaps at as a teatime treat at home. Every Norwegian household has a waffle iron but these could be made in a frying pan so don’t let that stop you. Serve these waffles with butter, strawberry or raspberry jam and sour cream. Or to be really traditional you could try them with a bit of brunost – which is Norwegian brown cheese and is completely delicious. Made with cows or goats milk, it is a soft-set cheese sold in a block with the same sort of texture as Port Salut. It taste a lot better than it sounds, which a delicate and slightly caramel-sweet flavour. If you come to Norway you must try it!

Served with coffee and always eaten with fingers, never a knife and fork, sharing and eating waffles is a big part of Norwegian food culture and one I was very happy to partake in. Have a go yourself for a brunch or teatime treat.

Norwegian waffles 

Ingredients

100g butter

4 eggs

200g granulated sugar

1 litre buttermilk

2 tsp bicarbonate of soda

500g plain flour

Method

Melt the butter the set aside for 5 minutes to cool down slightly

Place the eggs and sugar in a mixing bowl and whisk lightly by hand until well combined together but not fluffy. Inger-Anne told me not to use a mixer for this. For waffles you must do it by hand.

Add in the buttermilk, bicarbonate of soda and the melted butter and whisk to combine.

Then add in the flour in stages, approximately a third at a time and whisk again to combine so it is fully incorporated without any lumps. You then must leave the mix aside for 30 minutes to develop before starting to cook it.

To make the waffles, thoroughly pre-heat the waffle maker and brush with oil or cooking spray. If you don’t have a waffle iron these can of course be made in a frying pan like American pancakes or drop scones – you will miss out of the pretty pattern but the flavour will still be the same.

Cook them for around 2 minutes on each side over a medium-high heat. Once both sides are golden brown you can take them out and rest on a wire rack briefly before serving warm and eating with butter, jam and sour cream.

Exam stress-busting recipe

Well the time has finally arrived. My daughter’s GCSE exams have started, so as you can imagine the stress levels in our house are through the roof. It seems hard to comprehend that she has come to this point already. Through my happy tears at her Leavers’ Assembly, I found it hard to process the fact that she has become this rather wonderful young adult when it seems like yesterday that she stood proudly in the playground on her first day at school, with her unruly hair in braids and fiercely clutching her brand new book bag.

I have asked several friends how to cope with the stress and what I should be doing as a parent to alleviate the symptoms, though clearly I can do nothing about the cause. I read somewhere that whatever you say as a parent will be wrong. If you seem very caring and interested in what they are doing and get involved in revision, you are stifling them and poking your nose in and you couldn’t possibly understand. If you try and stay out of it you are accused of not caring. So parents should just accept that whatever you say will be wrong and get used to the sound of slamming doors.

My friend Sue from the Lemon Tree explained that her strategy with her son Harry was just to feed him. That was the best thing she could do to support him with his workload. This sounded like a good idea to me so I am planning to cook all the things that Lily likes and that I think will help her work and function as effectively as possible. We’re always told that fish is great brain food, and it’s not always the easiest thing to get our children to eat, so I thought I would share my family fish pie recipe with you. It’s got all that lovely fish, but couched in a wonderful cheesey mash and a silky parsley sauce which makes it one of my all-time favourite comfort foods too. I’ve used white fish, salmon and prawns in my recipe, as the children are not mad-keen on smoked fish, but some lovely smoked haddock in the fish mix also works a treat.

Here’s the recipe for you. If you are one of those households supporting stressed-out, exam-crazed teenagers, give it a go and hopefully it will allow them to relax for a minute, get some good fuel inside them before they launch back into the study and revision. Good luck to them all!

Fish Pie

Ingredients (serves 4)

500ml milk

300g salmon fillet

300g white fish (cod or haddock)

125g raw large prawns, peeled and de-veined

1 small onion, quartered

1 bay leaf

4 black peppercorns

75g butter

50g plain flour

handful of finely chopped fresh parsley

salt and pepper

200g washed baby spinach (optional)

1 kg potatoes (Maris Piper or King Edward are best)

50g butter

50ml milk

50g grated mature cheddar cheese

Method

  1. Heat the milk in a large shallow pan. Heat the milk to just short of boiling – you should just see a few small bubbles around the edges of the pan. Add the fish in large chunks (approx. 4cm) along with the onion and bay leaf and 4 black peppercorns. Reduce the heat and simmer for 8 mins, turning the fish once during that time. Lift the fish onto a plate and strain the milk into a jug to cool. You will need approx. 450ml milk, if there is slightly less top it up with fresh milk. Flake the fish into large pieces in a large ovenproof dish. Then add the raw prawns and mix thoroughly.
  2. Make the parsley sauce. Melt the butter in a pan very slowly then add the flour and stir well until you have a paste. Add the reserved milk from poaching the fish very gradually, stirring briskly all the time. Keep the heat on and keep stirring until the sauce thickens, this should take about 5 minutes. When the sauce is thick enough to coat the back of the spoon you can take the pan off the heat, season with salt and pepper and add the finely chopped parsley.
  3. Scatter the spinach leaves on top of the poached fish, then pour the sauce over the fish mix in the baking dish, making sure the fish and spinach are completely covered in the sauce. Now preheat the oven to 180ºC (fan).
  4. Peel and chop the potatoes into big chunks the cook in salted, boiling water until soft and cooked through. This should take 25-30 minutes. Drain off the water and allow the potatoes to dry off in the open pan. Then mash with the butter and 50ml of milk and season well with salt and pepper.
  5. Finally add the mashed potato to the top of the fish, scatter over the grated cheese and bake in the oven for 40 minutes until golden and bubbling on top. Serve with peas or any steamed green vegetables.